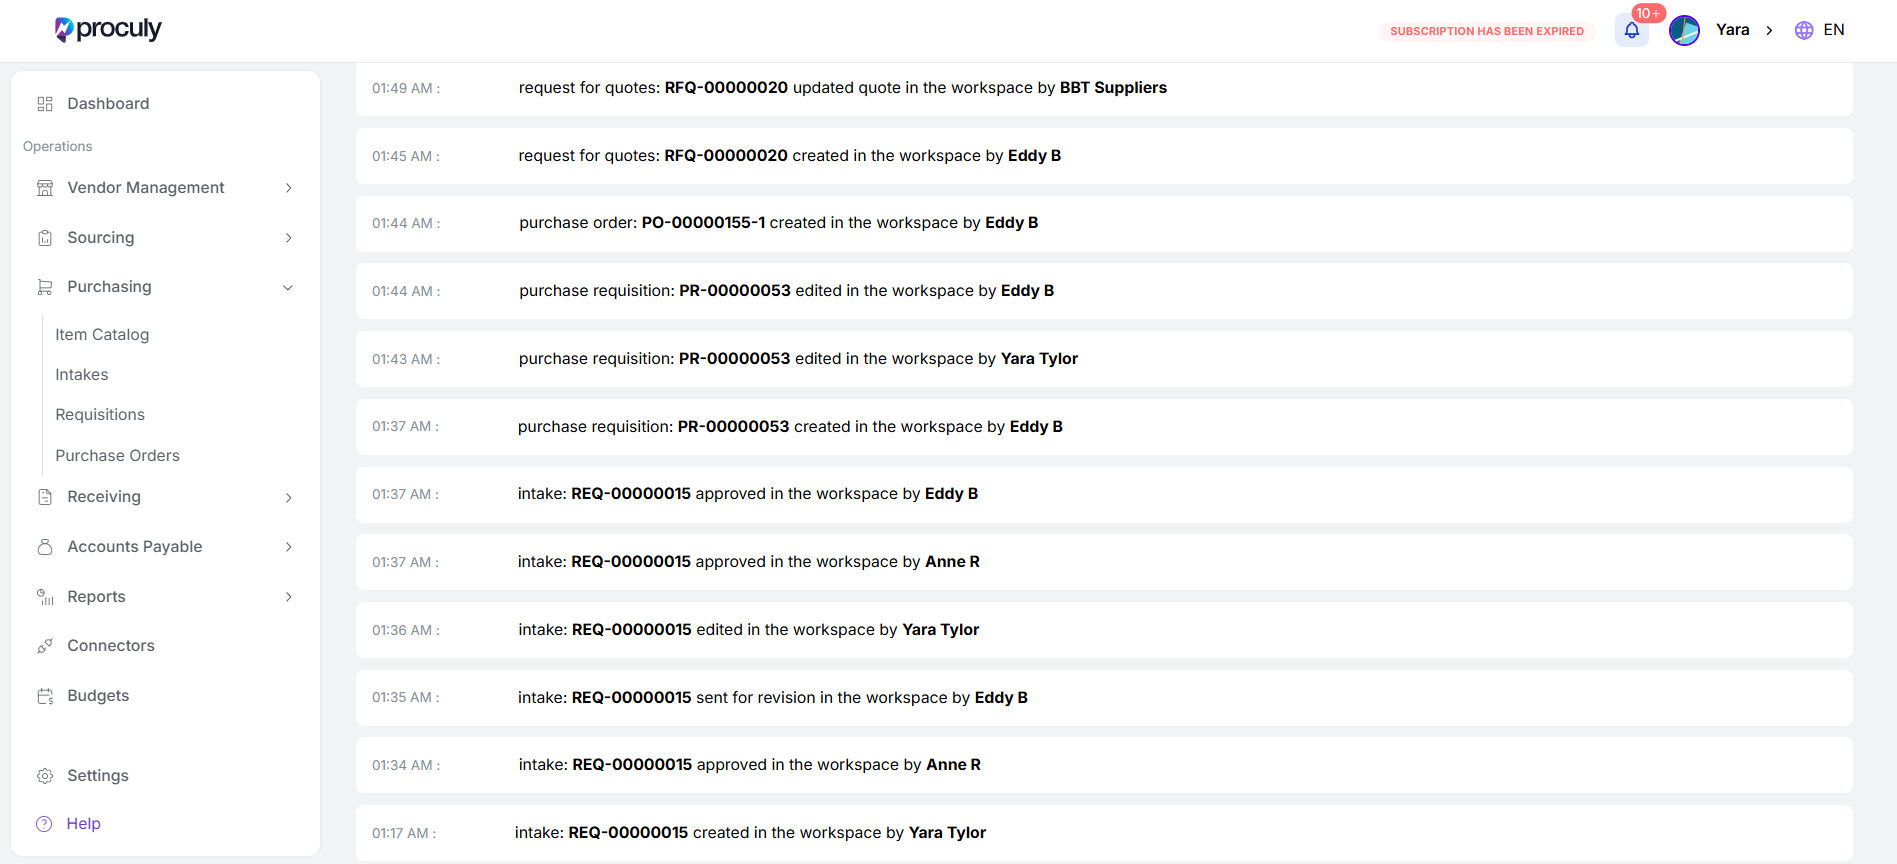
Activity Logs
The activity log displays all actions taken throughout your procurement flow, from intake to payment. It records what action was performed, by whom, and on which procurement document. Activity logs are available for the following modules: Intakes, Requisitions, RFQs, Purchase Orders, Received Notes, and Invoices. Go to the tabular view of any procurement module. Click on the action button (⋮) next to a record. Select ‘View Activity Log’ from the dropdown.
Detailed log of actions
Detailed log of actions
It will show you a detailed log of actions taken during the procurement process for that specific document.
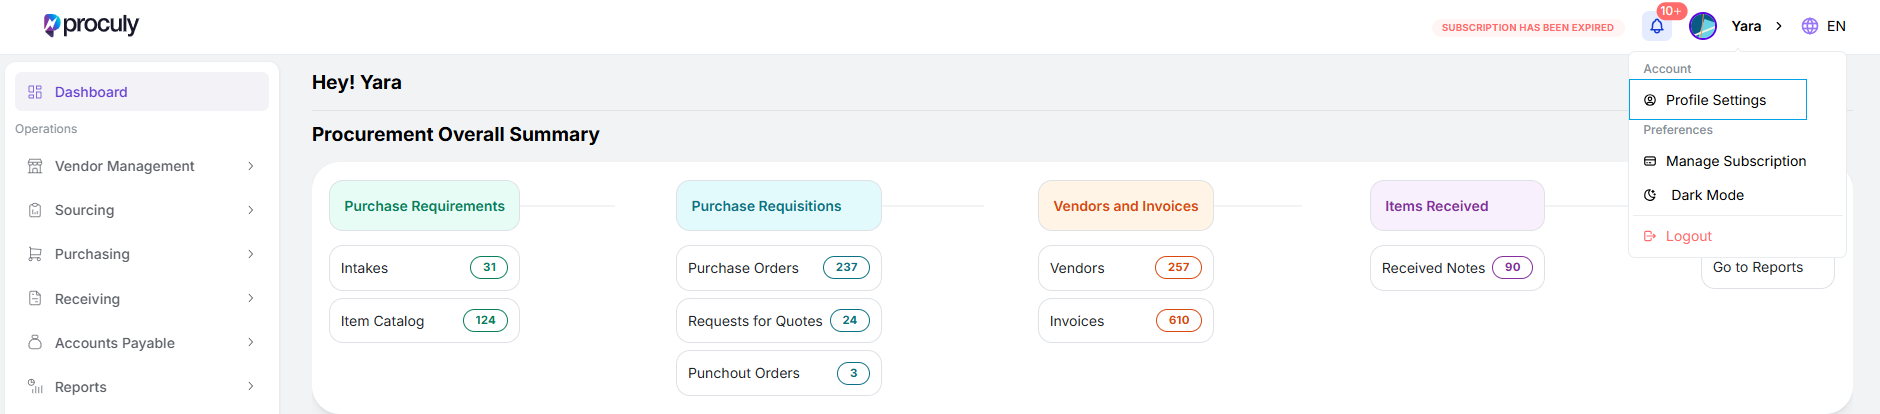
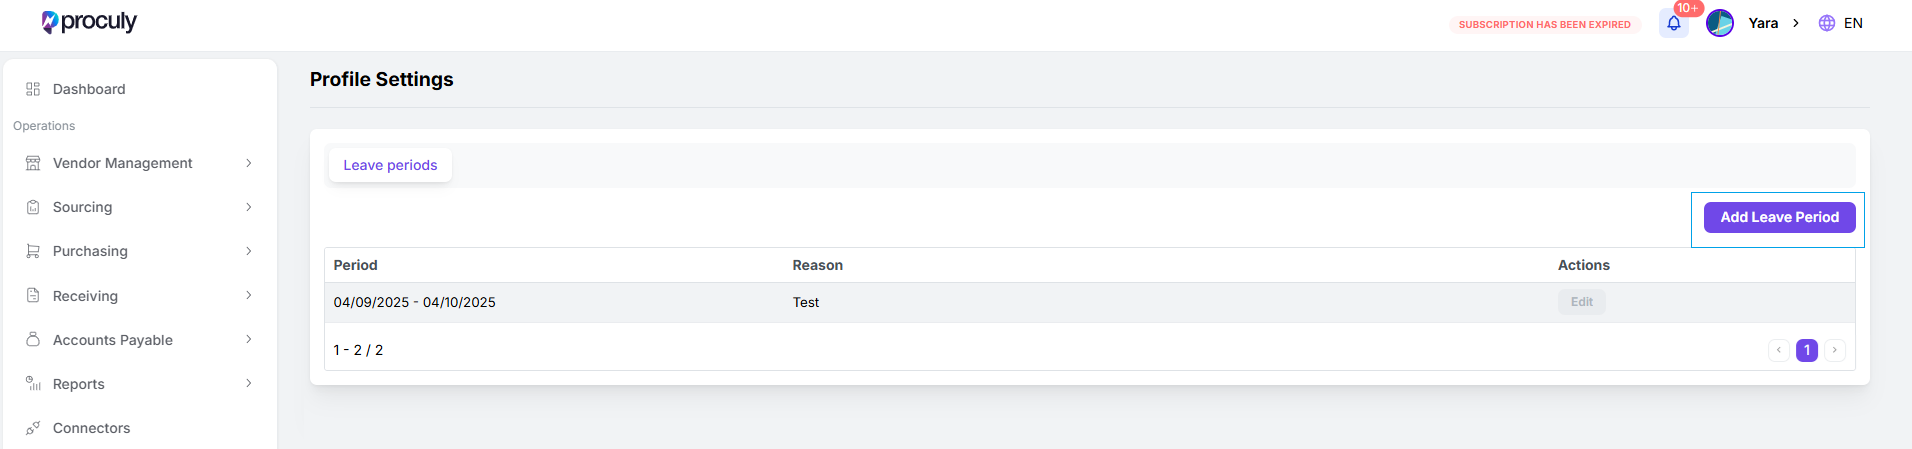
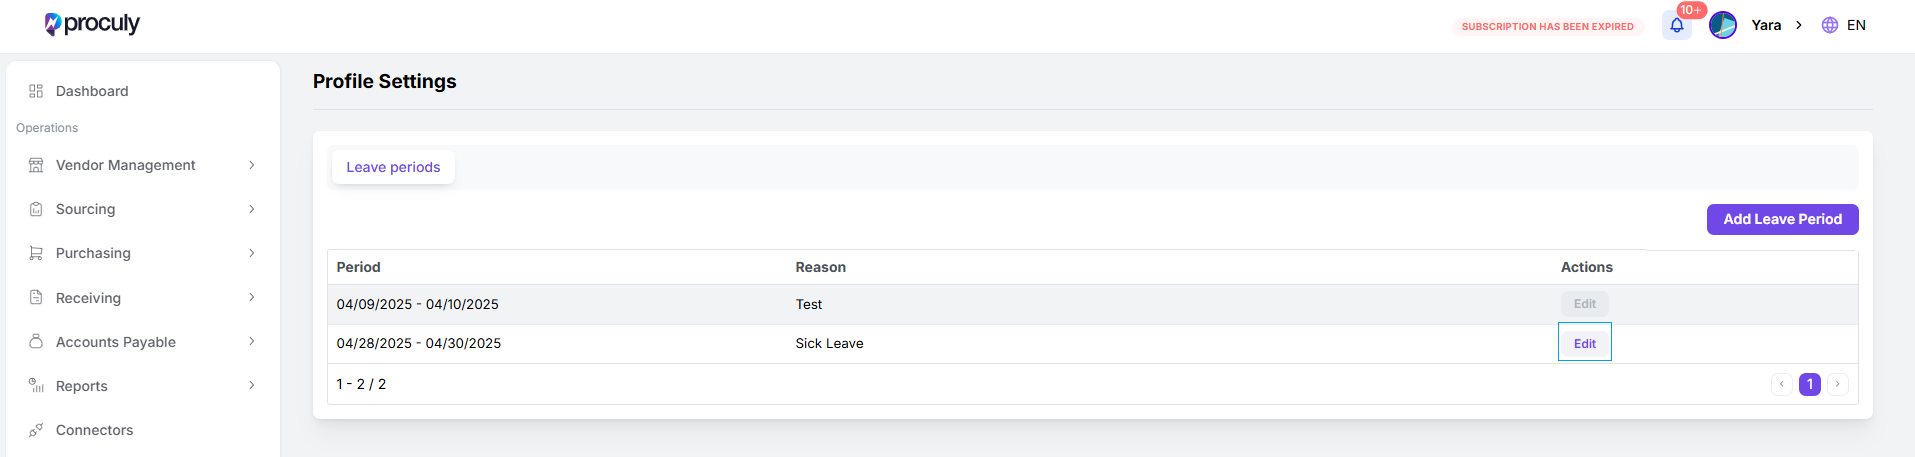
Mark as On Leave
You can set a leave period in the system to ensure your pending approvals are automatically redirected to an alternate approver, preventing any interruptions in the procurement flow. To set a Leave Period:Go to
Go to
- Go to Profile Settings to access your Leave Periods page.
Add
Add
- Click ‘Add Leave Period’ to create a new one.
Select
Select
- Select the start and end date for your leave, optionally add a reason, and click ‘Save’.
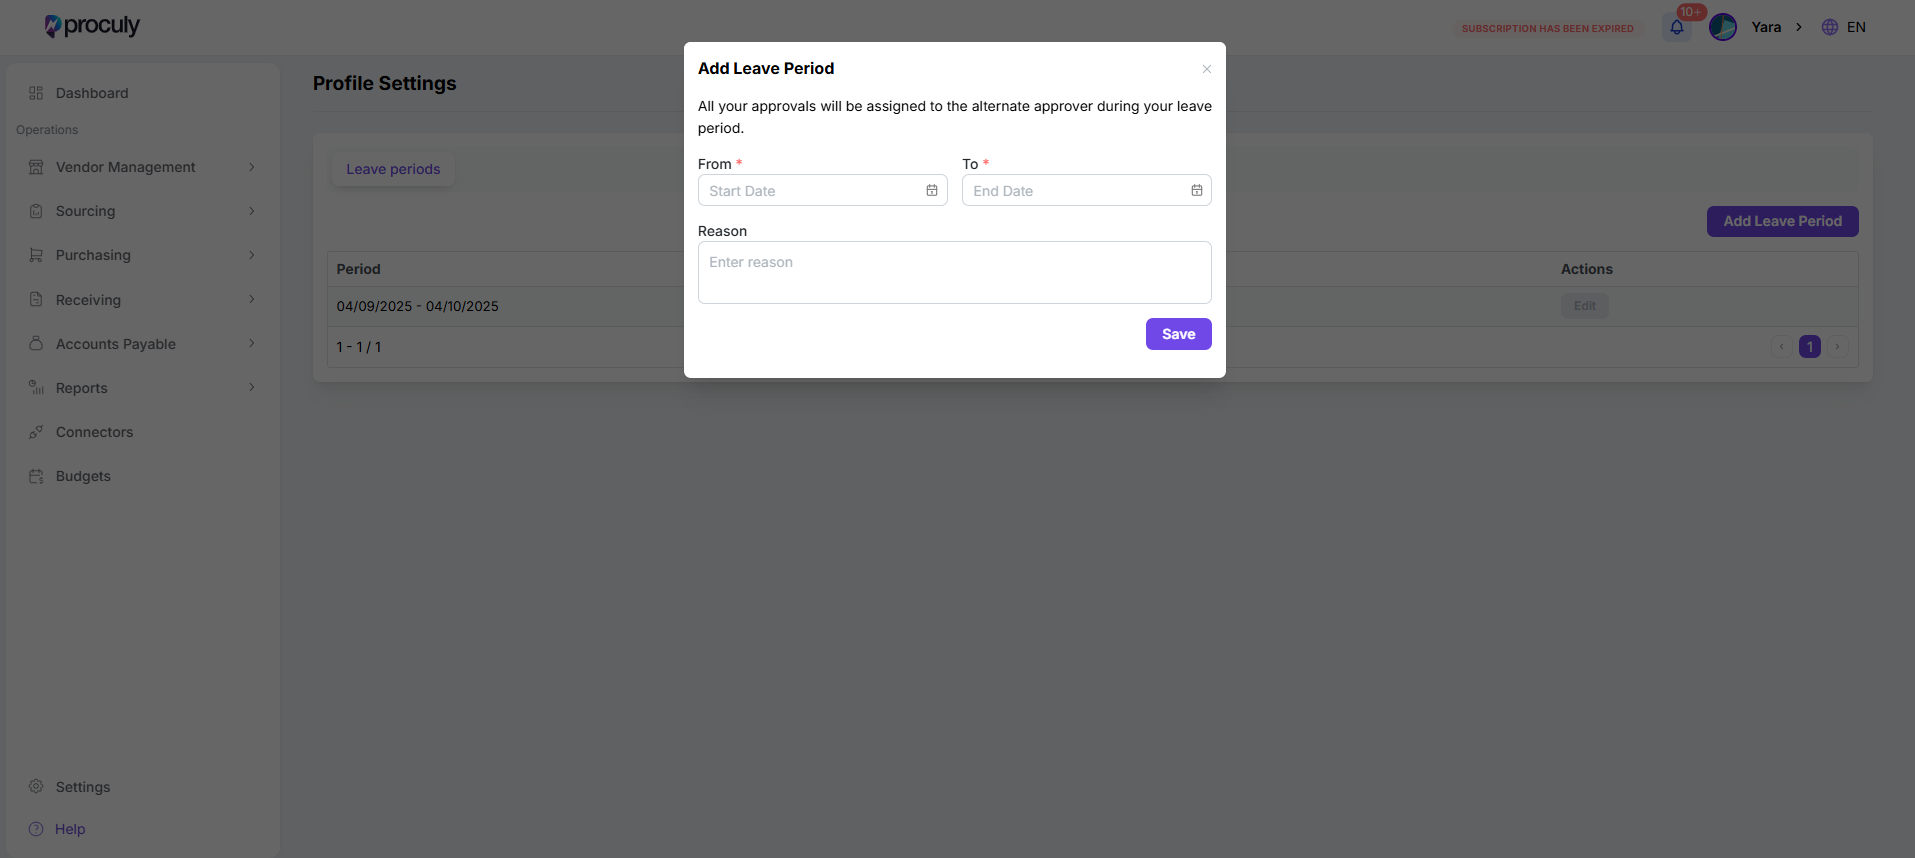
Note: The leave period runs from the beginning of the ‘From Date’ to the beginning of the ‘To Date’. Also, you cannot save leave periods that overlap with existing ones.
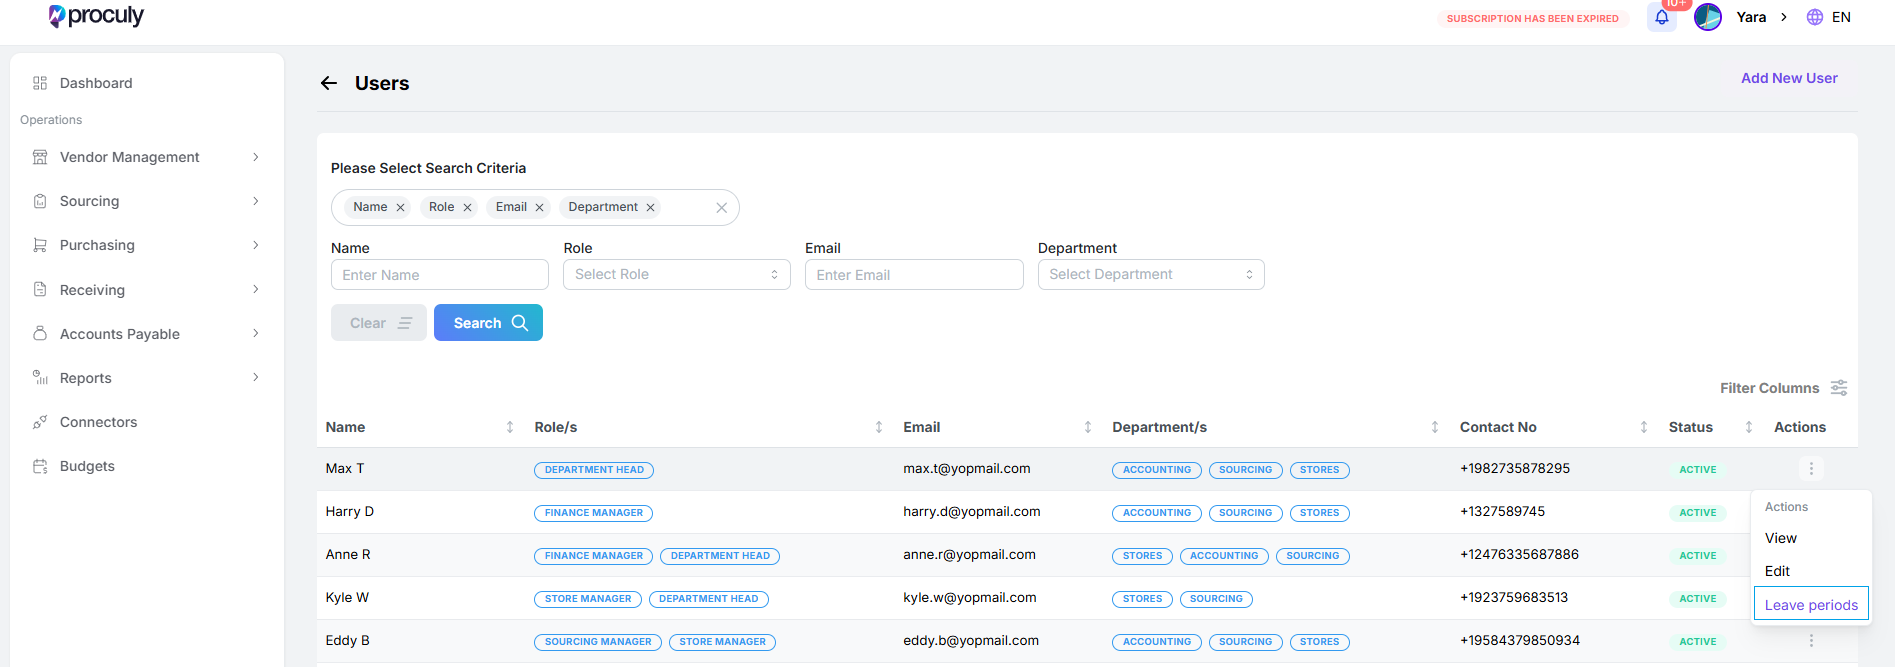
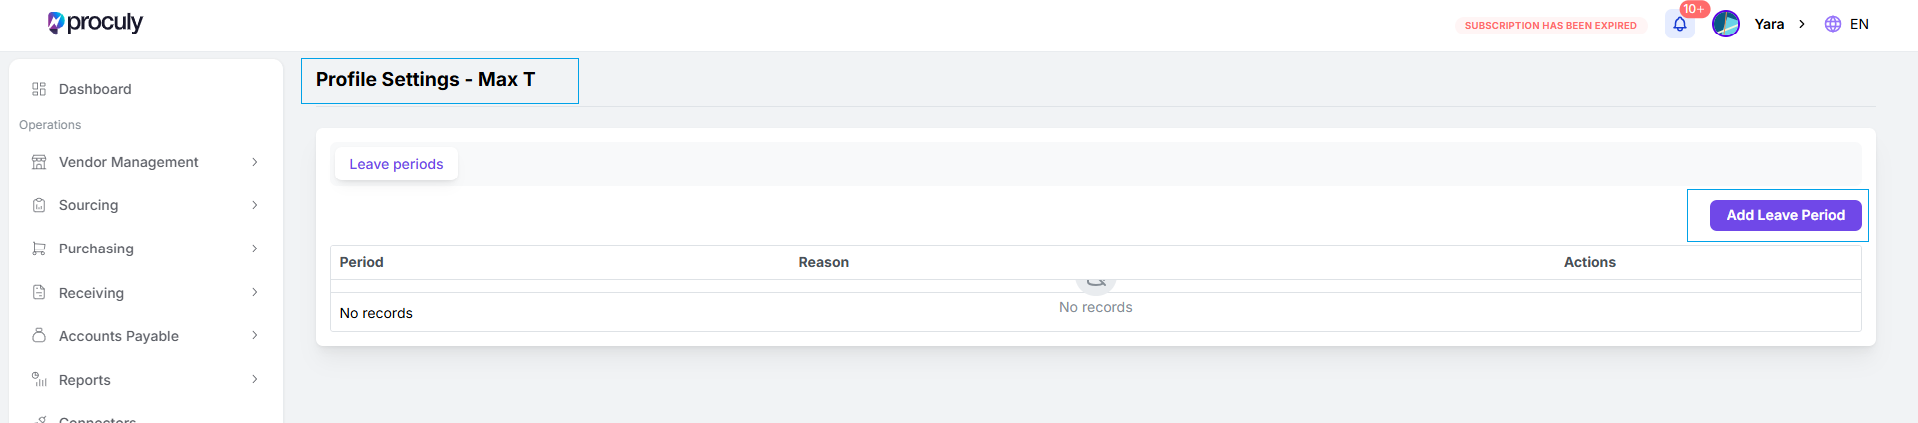
Settings > User Management, click the action button (⋮) for the user, and select ‘Leave Periods.’ This will take you to the user’s leave periods page, where you can add or edit leave periods on their behalf.
Multilingual Support (Spanish)
You can use Proculy in Spanish. To change the language, go to the top right corner, click on the language icon, and select Español from the dropdown menu.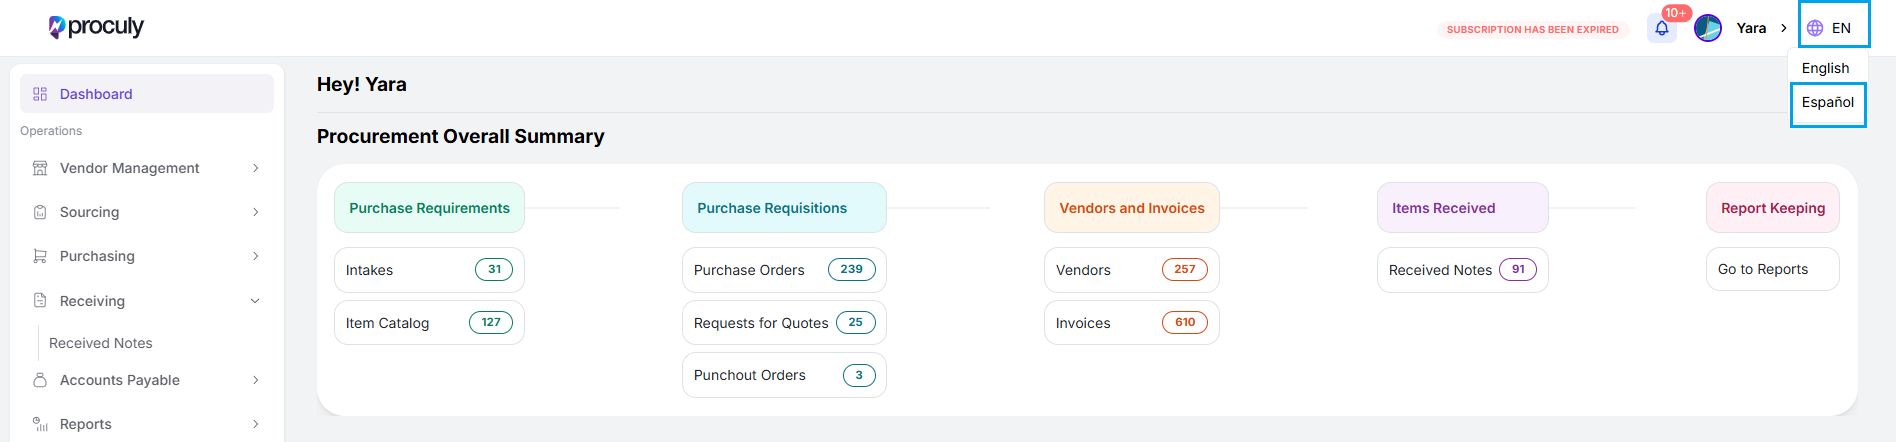
Support Punchout Catalogs
We support punchout catalogs, which integrate your purchasing system directly with suppliers like Amazon or Staples. With punchouts, you can browse a supplier’s website, add items directly to your requisition, and complete the purchase automatically once the order is approved without needing to manually re-enter item details. This eliminates unnecessary steps, reduces errors, and keeps your purchasing process smooth and connected. Without punchouts, users would have to manually key in item information and separately place the order, creating friction and risks for document mismatches. Punchouts simplify the entire process. How to use Punchout Catalogs: Create a Requisition:- Go to
Purchasing > Requisitions > Create Requisition. Fill in the required header fields. - Click on ‘Add from Punchout Catalog’. A pop-up will appear where you select the punchout group and user. Only punchout groups matching the shipping address you selected will be listed. After selecting a group and a user, click ‘Proceed’.
- You’ll be navigated to the vendor’s website. Browse, add items to your cart, and when ready, proceed to checkout and click ‘Submit for Approval’.
- This will bring you back to your requisition with the cart items automatically added.
- Assign a category to each line item to link them to a GL account, and save the requisition.
- Punchout items will be indicated with the vendor’s logo in the View page.
- View your requisition and select the punchout line items. Click ‘Create PO’.
- The created PO will be saved as a draft. You can view it, link a budget to the order, and click ‘Submit’ to send it for approval.
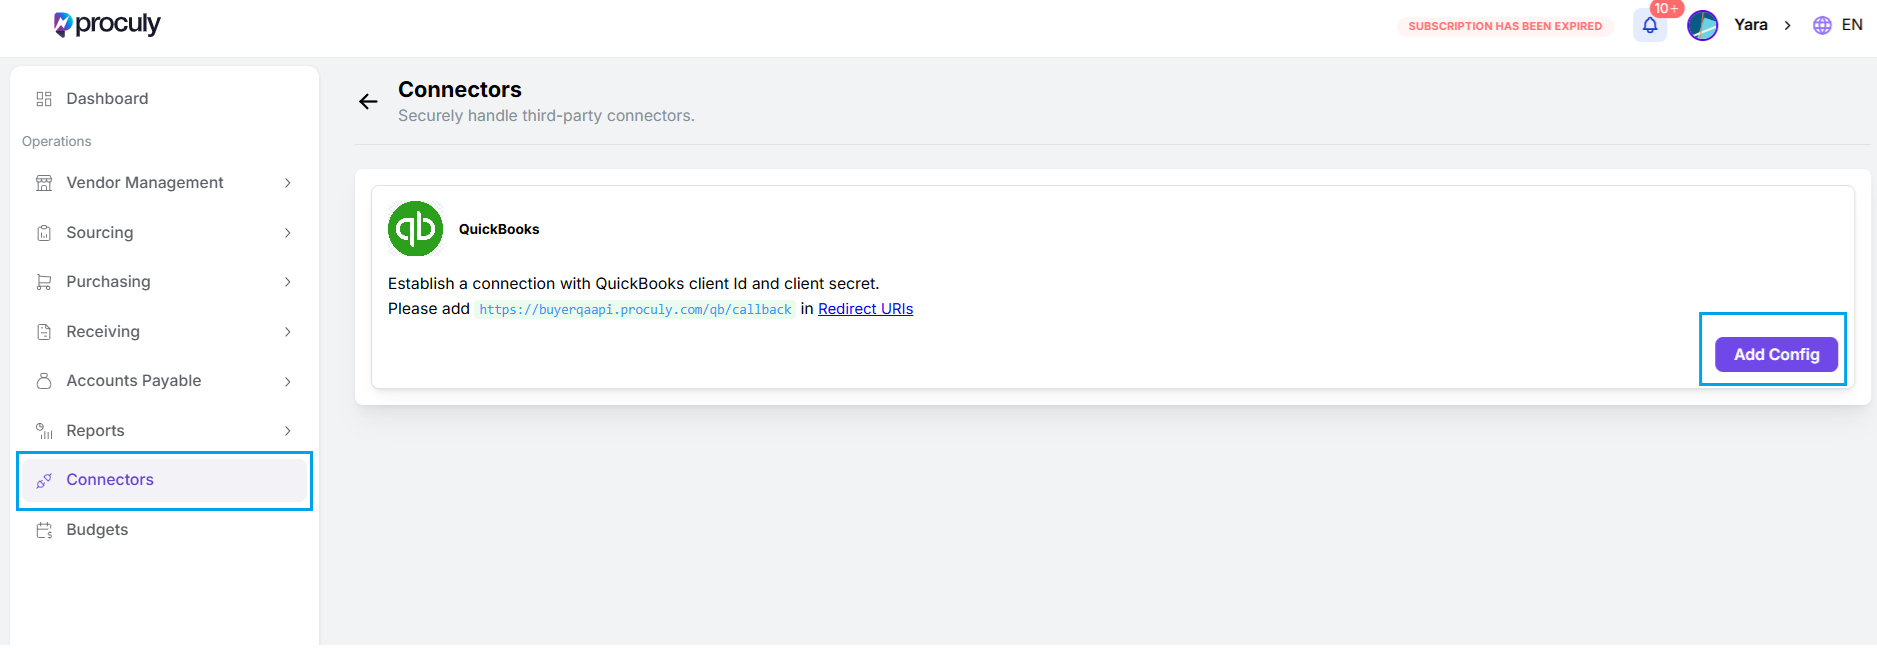
Integrations & API Connectors
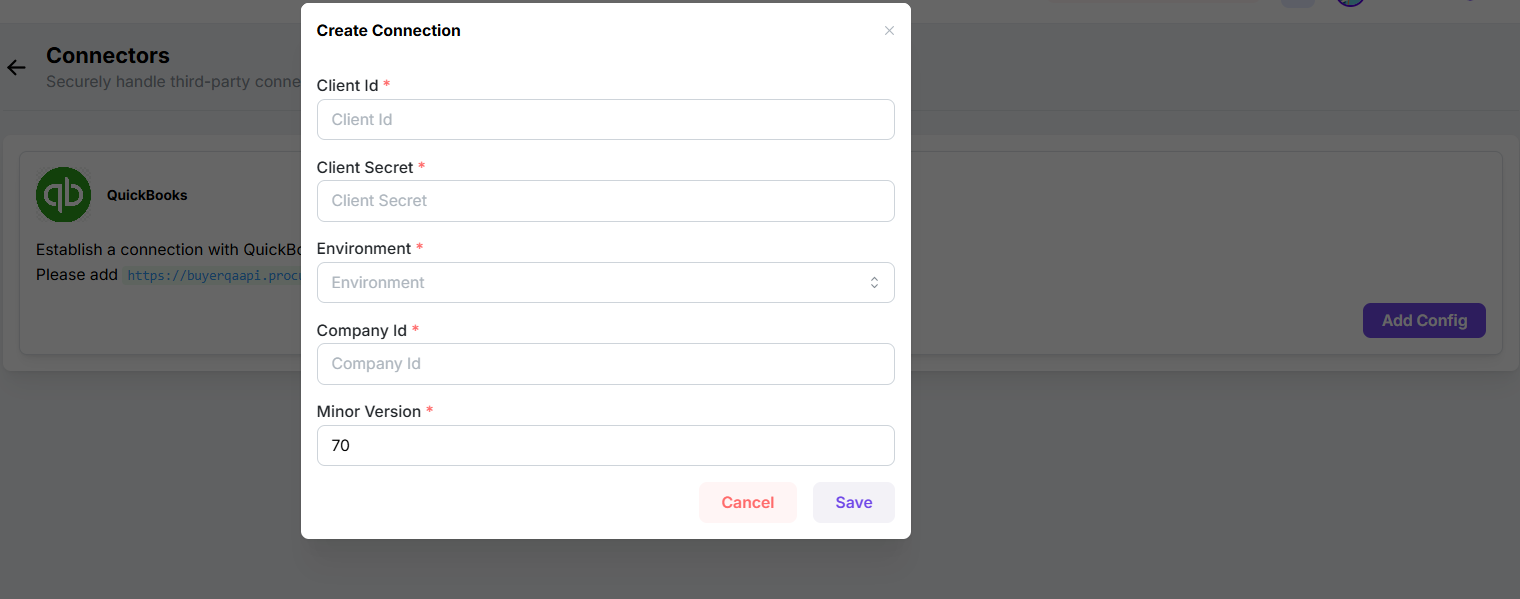
Proculy offers a connector framework to integrate third-party applications relevant to your procurement process. Currently, you can connect your inventory in QuickBook to Proculy.- Navigate to Connectors in the main menu and click the Add Config button for QuickBook. In the popup that appears enter your QuickBooks API credentials and relevant details. Click Save to add the configuration.
Create Connection
Create Connection
- After saving the configuration, click Create Connection. You will be redirected to QuickBooks to sign in and authorize the connection.
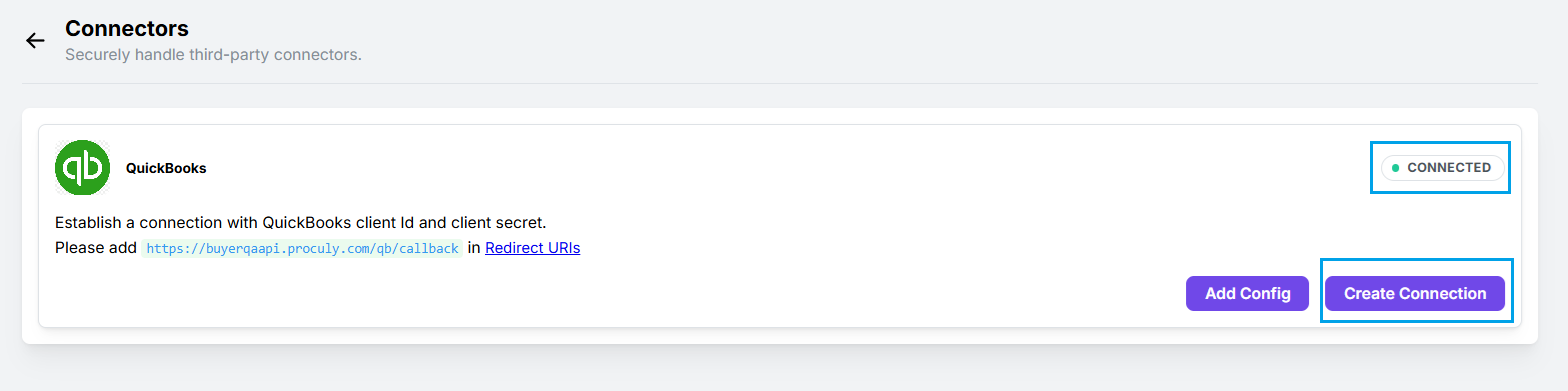
Once connected, your QuickBooks account will be linked with Proculy.
- Next, go to
Purchasing > Item Catalog > Goods. There, a ‘Sync with QB’ button will be available for each item, click it for the items you want to sync. These items will now appear in your QuickBooks inventory.
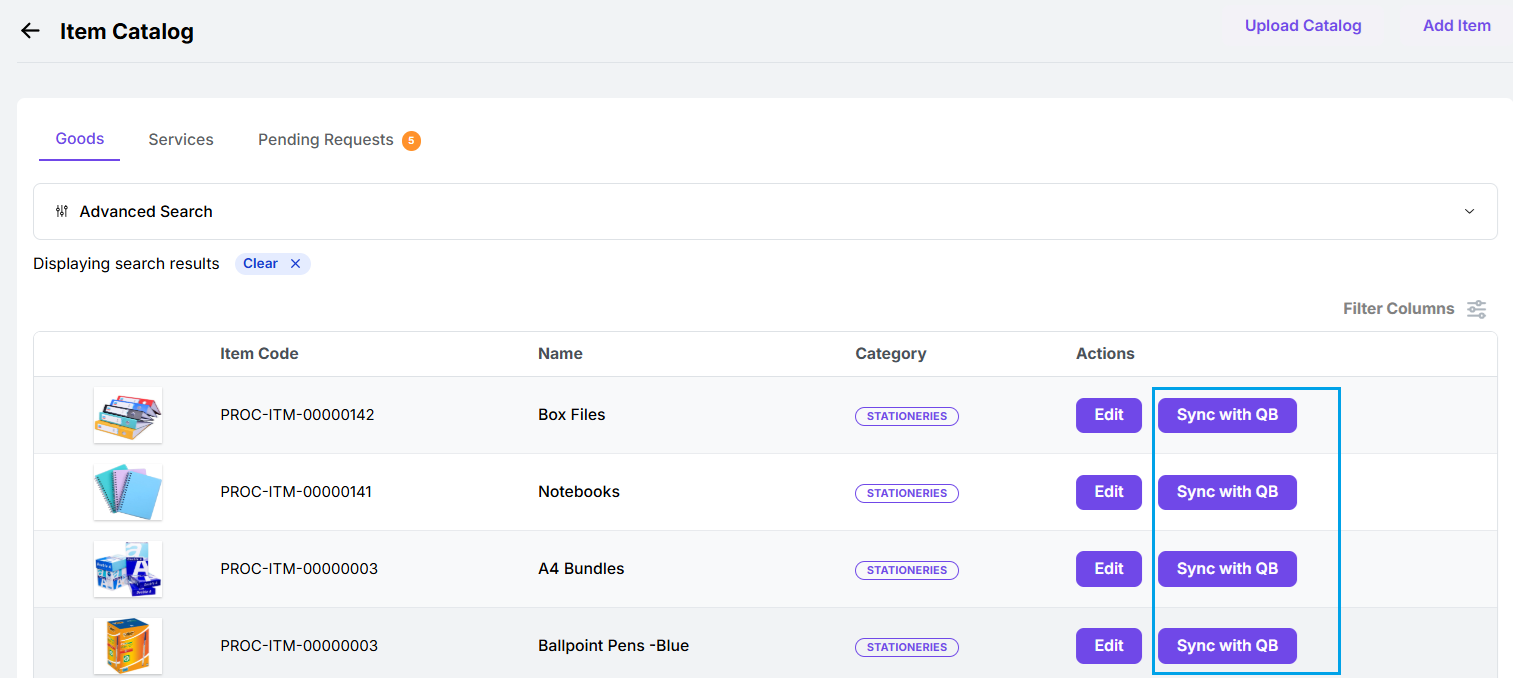
- When an item is purchased and received through Proculy, the corresponding inventory quantities in QuickBooks will be updated automatically.